
Warning: You are viewing an older version of this documentation. Most recent is here: 42.2.0
Multiple Tenants
Multi Tenancy
What is Multi Tenancy?
The multiple tenants architecture will best fit large corporations or MSCS having the desire, or the need, to logically separate network events from each customer, or tenant. One tenant having no access to others tenants’ data.
In this situation, a central SCS will collects all networks events regardless from which network they belongs to and will ensure a strict isolation on the SCS console.
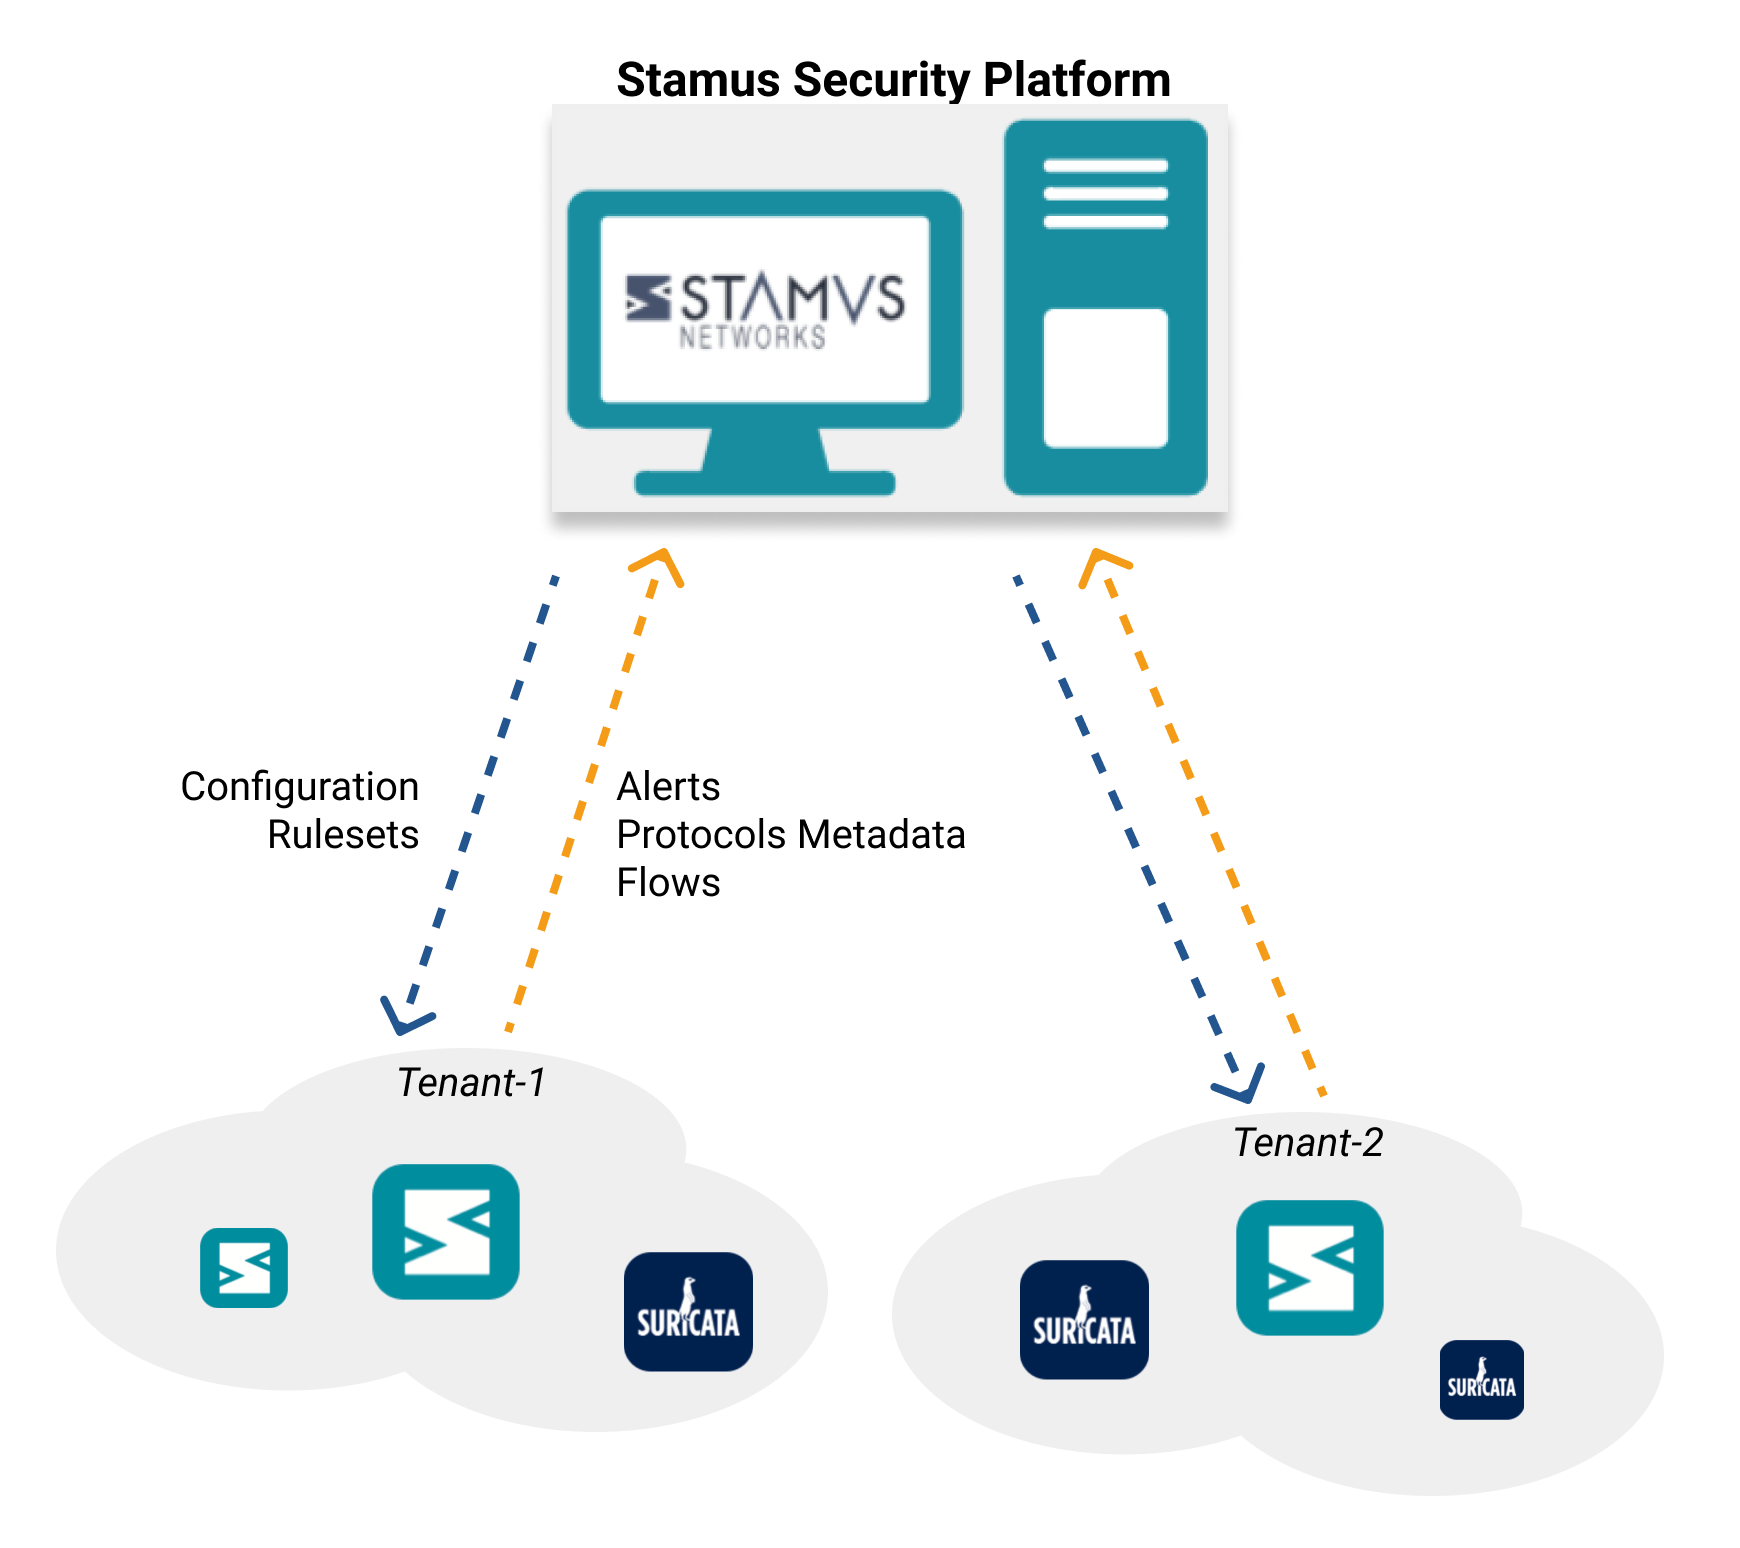
As an administrator or a user of SCS, you will be able to switch from one tenant to another using in dropdown menu in the web interface.
Activating Multi Tenancy
In order to start using the Multi Tenancy feature, you first need to enable it from Appliances Global Settings -> Main tab, from Stamus Networks drop-down menu on SCS.
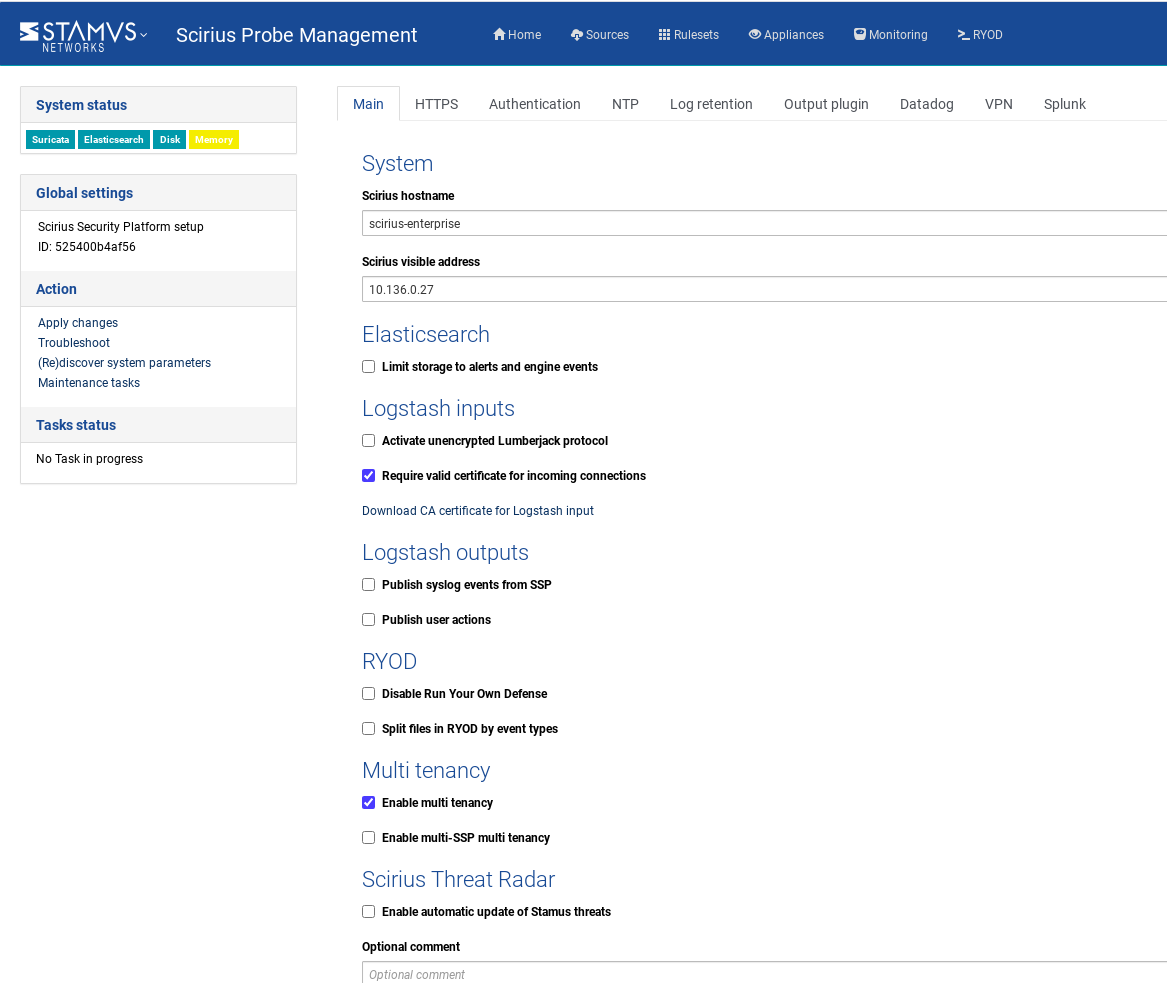
Then you need to Apply changes.
Afterwards, you have to create and assign Network definition to the Stamus Network Probe and Apply changes. More information on Network Definitions can be found here
Note
Each Tenant will be named following the name of the Network Definition used on the relevant Stamus Network Probe.
Important
Since stamus_processing is tied to a Ruleset, if 2 changes are made to this Ruleset, then both will propagate to all devices, using the Ruleset.
This means that if you use the same Ruleset on all of your devices, any changes made to it - will affect all devices. Thus, when using Multi Tenancy, it is recommended to have a Ruleset per group of tenants.
For example, Ruleset A for Customer A and Ruleset B for Customer B
If the Ruleset used is the same for 2 tenants that have the same IP, for example a workstation from Customer A has the same IP as a domain controller from Customer B, then you should definitely have 2 different Rulesets.
Note
Due to the specifics of this feature, the data that was collected and visible in the console before enabling it, will no longer be present there.
Note
Activating multi-tenancy cannot be reverted without losing all previously collected data.
Important
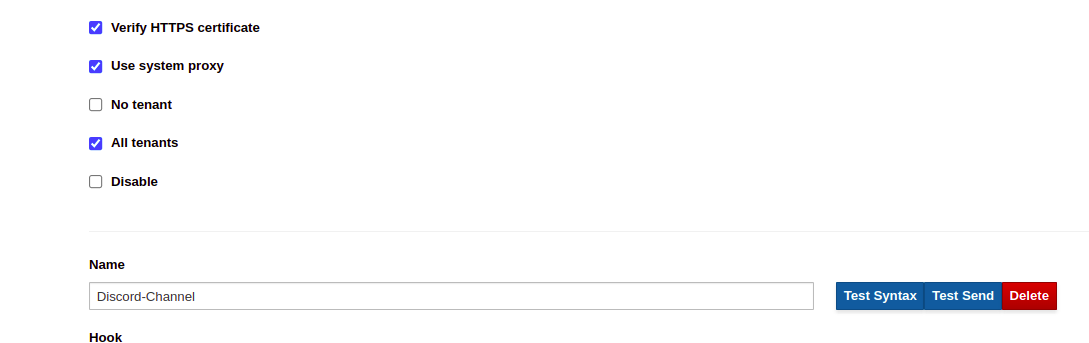
If you are already using Webhooks and would like to enable Multi Tenancy feature, you should have in mind that you need to adjust your Webhooks Integrations setup in order to continue receiving notifications/data on your integrated systems (such as a ticketing system, a SOAR, a messaging app like Slack or Mattermost, and so on).
To do this, once you have enabled Muti Tenancy, you need to:
From
Stamus Networksdrop-down (Administration app) -> selectIntegrationspageSelect the tenant(s) you would like to use for your Integration(s)
Submit
Using Multi Tenancy
To switch from one Tenant to another, simply use the dropdown menu in the header as illustrated hereafter
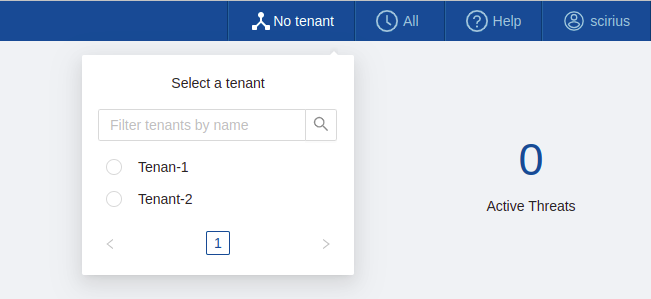
Selecting a specific Tenant shows data from SN Probes that use the related Network Definition. Each Hunt tab and view will show data related to the selected Tenant only, and no info about the other.
Hint
When No tenant is selected, data from Probes with no Network Definition, or SN Probes older than v34.1.0 will be displayed.
Chained SCS Tenancy
Important
Starting with U37.0, the Chained SCS architecture is deprecated.
What is Chained Tenancy?
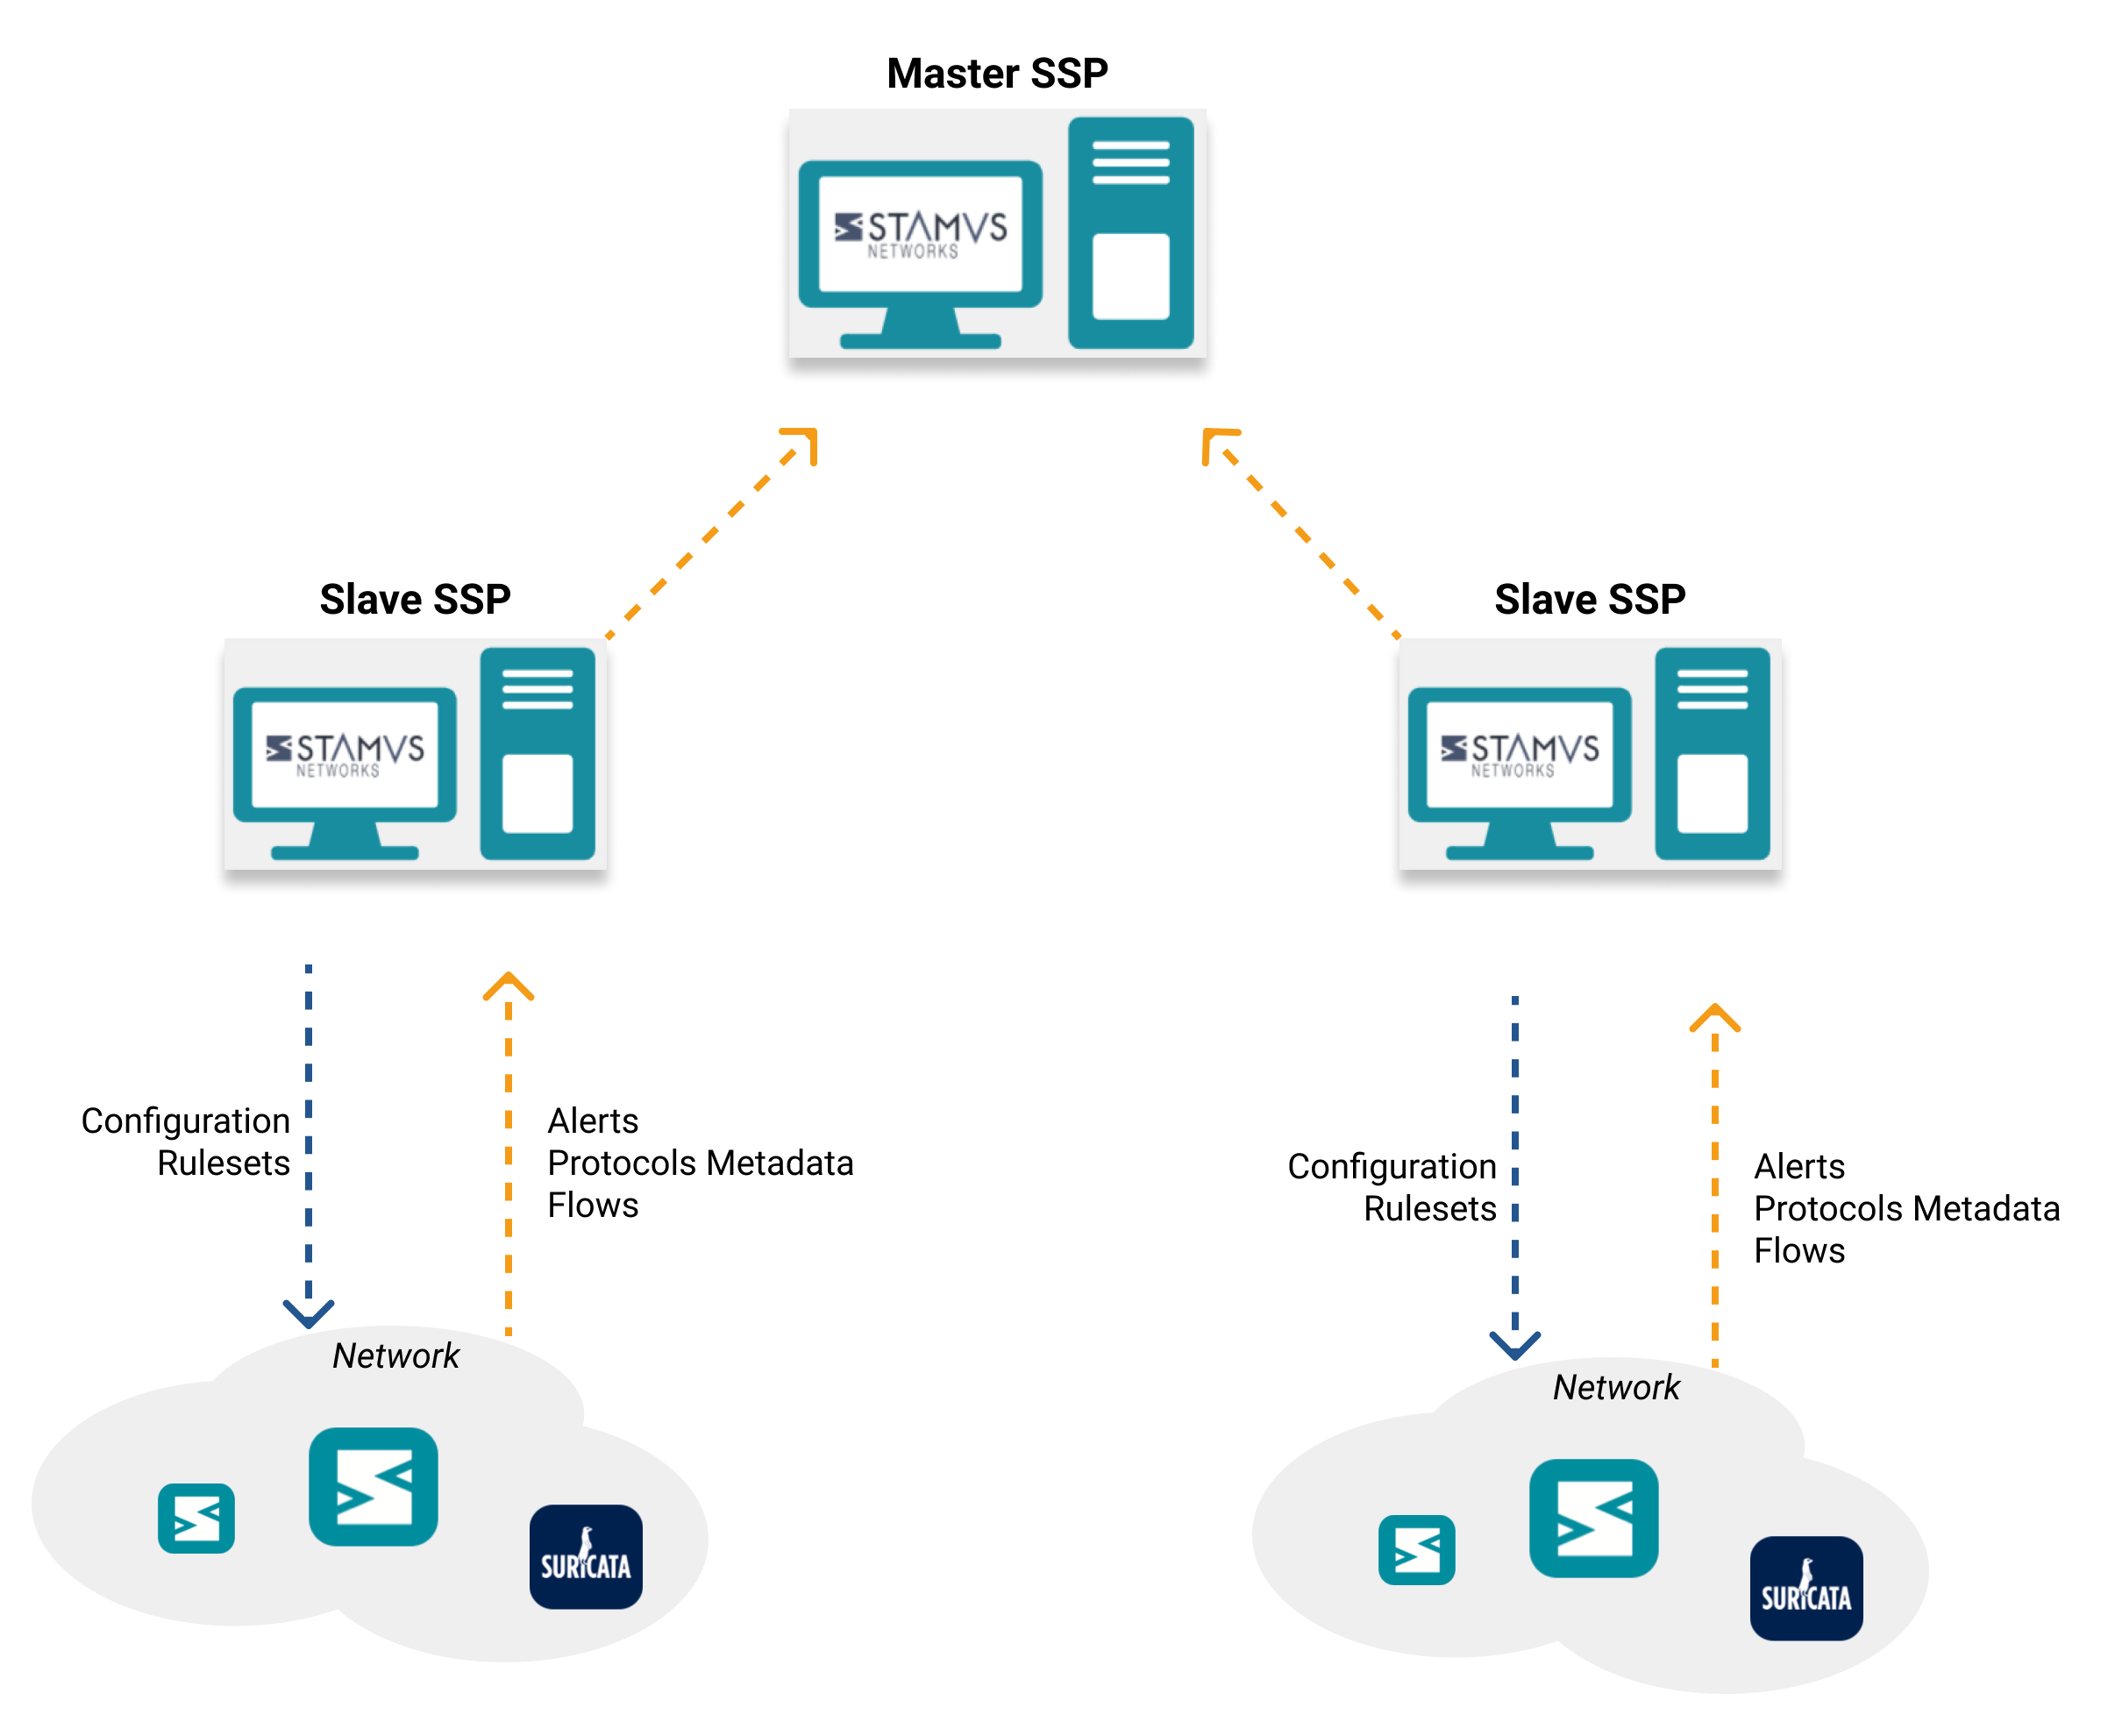
The “Chained SCSs” or “Multi SCS Multi Tenancy” feature can be enabled in order to allow multiple SCSs to forward to a Central one.
Thus, the main/central SCS would be a Master, while all of the chained SCSs - would be Slaves. Each Slave SCS gets an ID (based on its mac address). There is a key in the Network Definition to associate Slave SCS to the relevant Network Definition. Consequently, each event on the Master SCS, would contain this key, as well as the hostname of the Slave SCS it is coming from.
Activating Chained SCS Tenancy
This architecture require at least 2 SCSs, one Master and one Slave.
Master SCS
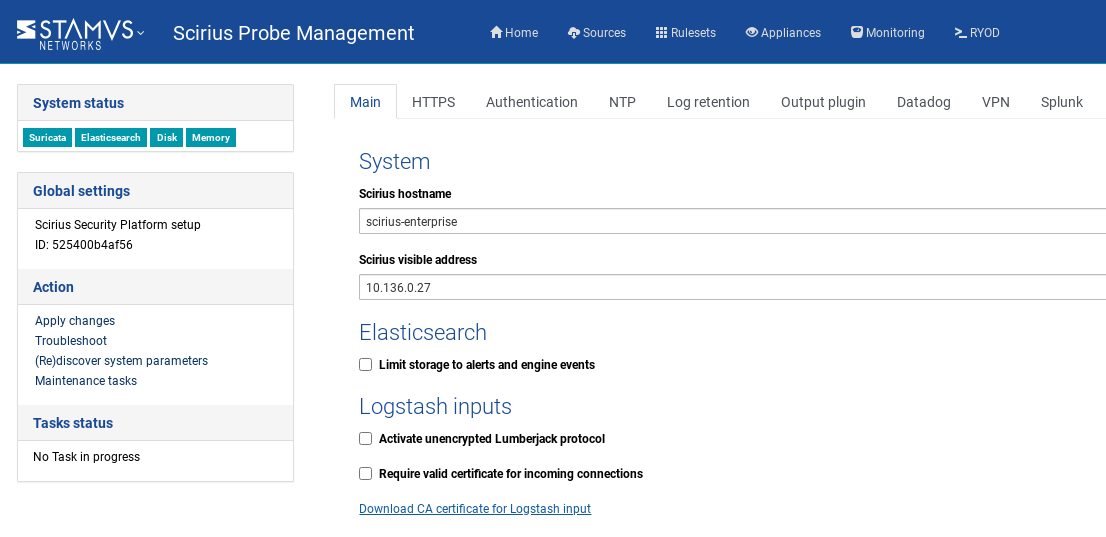
On the Master SCS, in Appliances Global Settings -> on Main tab (accessible from Stamus Networks drop-down menu, enable both Multi tenancy and Enable multi-SPP multi tenancy as illustrated hereafter.
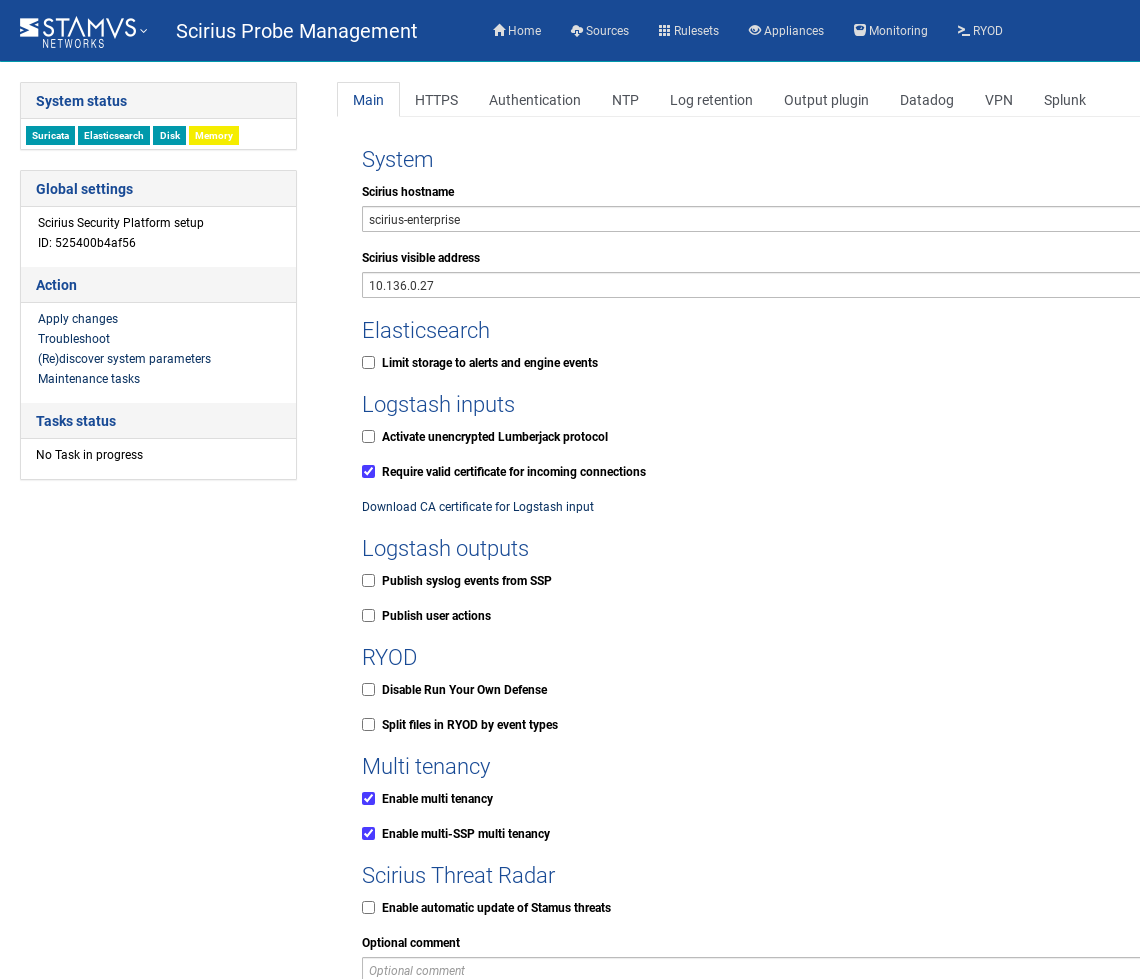
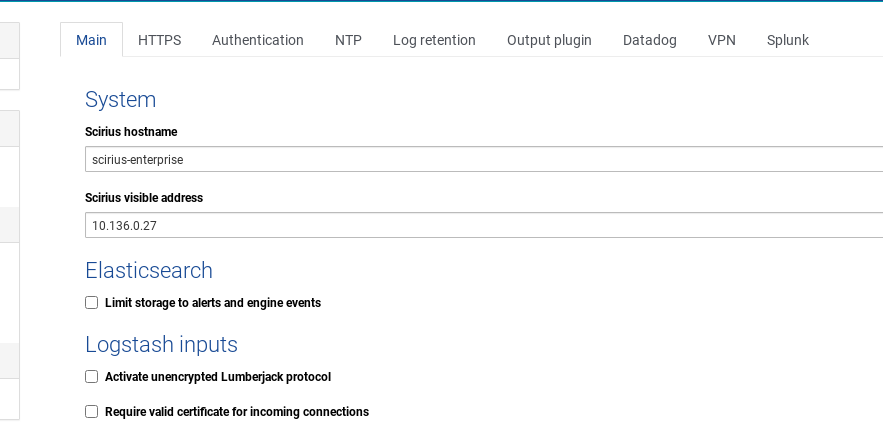
Disable Require valid certificate for incoming connections checkbox, under Logstash inputs section on Main tab.
Note
You must ensure the underlying transport layer is trusted.
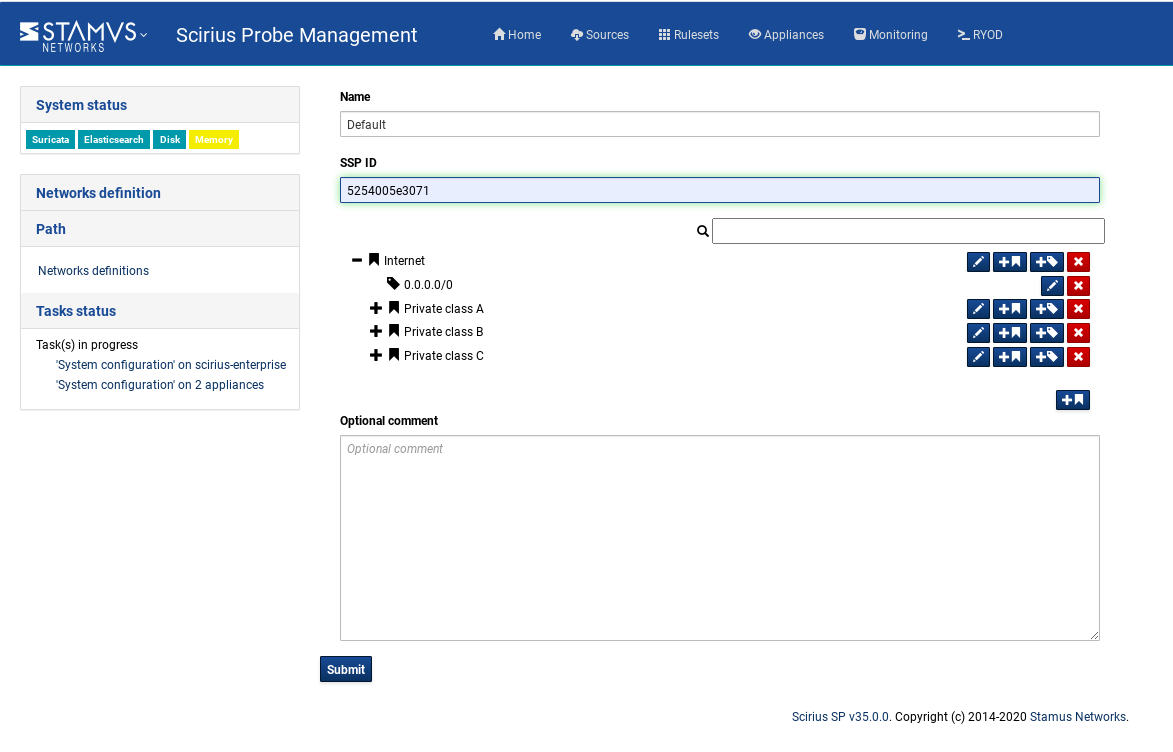
Next, you have to create one Network definition for each Slave SCS: set ID of the slave SCS in the See id field. The ID is displayed in the Appliances Global Settings page of each Slave SCSs.
And trigger an Apply changes task on the Master SCS. Then proceeding with the Slaves configuration.
Slave SCS
On the Slave SCS:
Register the SN Probe (configure it, add a ruleset, etc.)
Go to
Appliances Global Settings->Output plugintab, and configure theLumberjack outputsection:
Note
Hosts field must contain the IP of the Master SCS
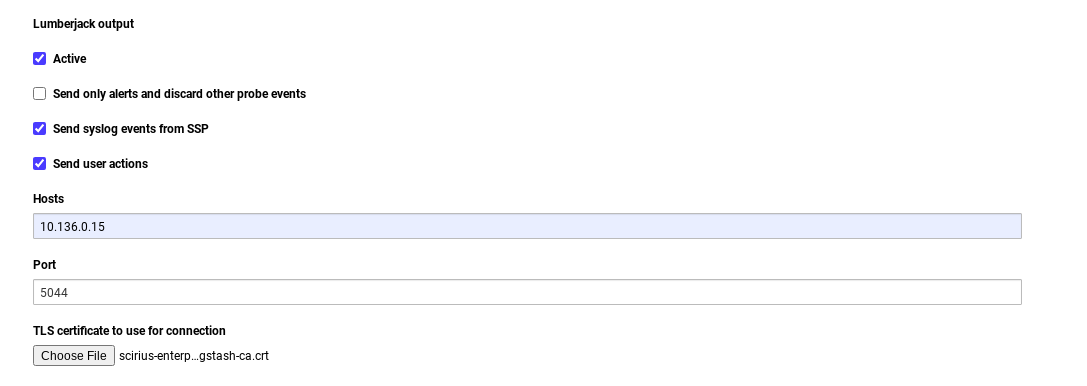
The TLS certificate to use shall be exported from the Master SCS, in Appliances Global Settings -> Main tab, under Logstash inputs section:
Once having configured all of the above, trigger an Apply changes task on each of Slave SCS.
Disabling Multi Tenancy
If you wish to disable Multi Tenancy, you need to disable it from Appliances Global Settings -> Main tab, from Stamus Networks drop-down menu on SCS.
Then you should do an Apply Changes on the SCS and your Stamus Network Probe(s).
Important
You should manually delete previously generated data, after disabling multi tenancy, in order to avoid irregular behavior on how data is displayed.