Warning: You are viewing an older version of this documentation. Most recent is here: 42.2.0
Microsoft
Microsoft Entra ID SAML integration
The goal of this document is to assist in configuring the SAML authentication with Microsoft Entra ID and Clear NDR®.
Entra ID Configuration
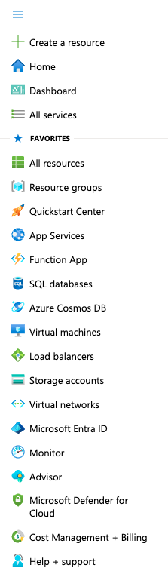
Log in to your Microsoft Azure Portal, click on the 3 lines on the top left and select Microsoft Entra ID
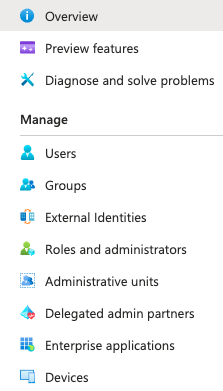
Then navigate to Enterprise applications
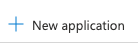
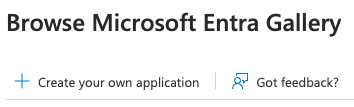
Click on New application:
Click on Create your own application:
Enter the name of your application and select Integrate any other application you don't find in the gallery (Non-gallery)
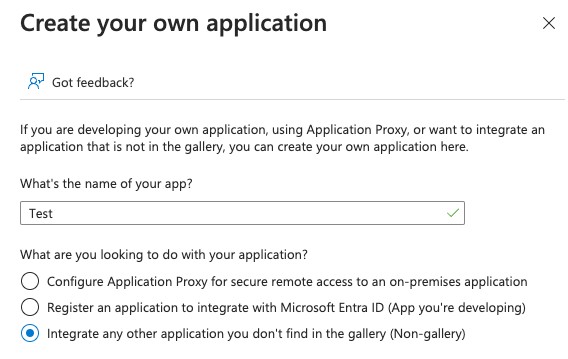
Then click on save.
Navigate to:
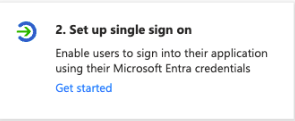
Then click on :
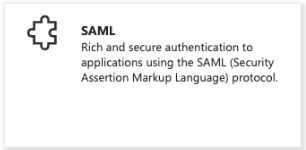
Fill in the following fields:
Identifier (Entity ID) : https://CNCS_IP/saml2/metadata/
Reply Url: https://CNCS_IP/saml2/acs/
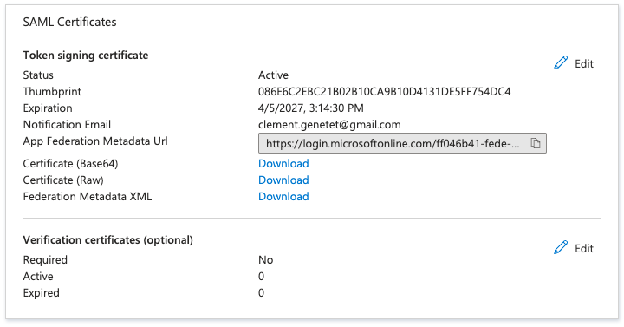
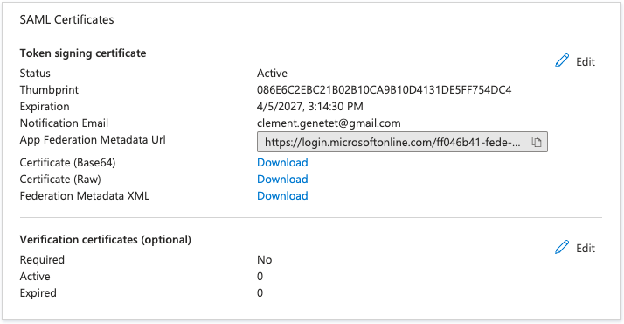
Download the Federation Metadata XML file:
Configuration of Clear NDR
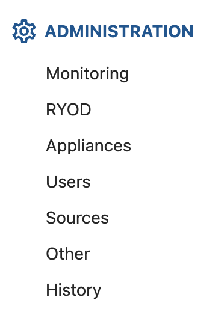
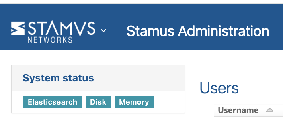
Log in to Clear NDR® and navigate the Administration site by clicking on any words below Administration on the left hand side:
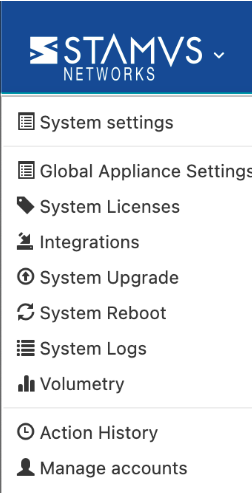
In the Administration site, click on Global System Appliances in the drop down menu in the top left:
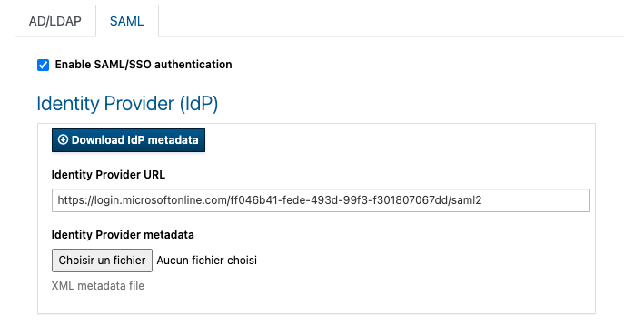
Navigate to Authentication and click:

Fill the following fields:
Identity Provider Url: this is the URL of the IdP, navigate to your Azure portal > Entra ID > Enterprise Applications and select the application you have created.
Click on Single Sign On and copy the App Federation Metadata URL:
Then upload the Identity Provider metadata (XML file you have downloaded in a previous step)
In the Service Provider section, fill in the following fields:
Service Provider Name: for example ProductionCNCS
Service Provider URL: https://production-scs.domain.com/
Tick Use name id as username (this is required for Azure ID integration”

NOTE: Click on Apply then Apply changes and wait for the task to finish succesfully.
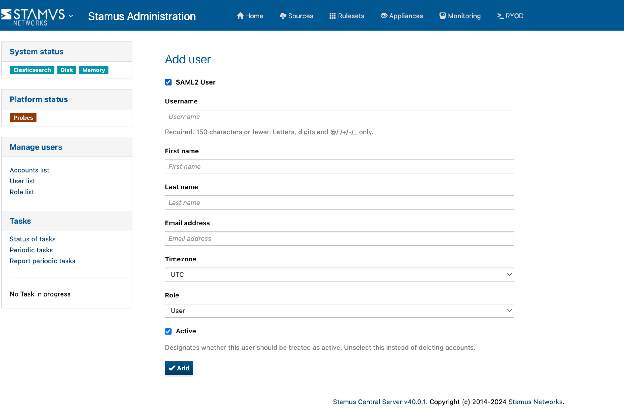
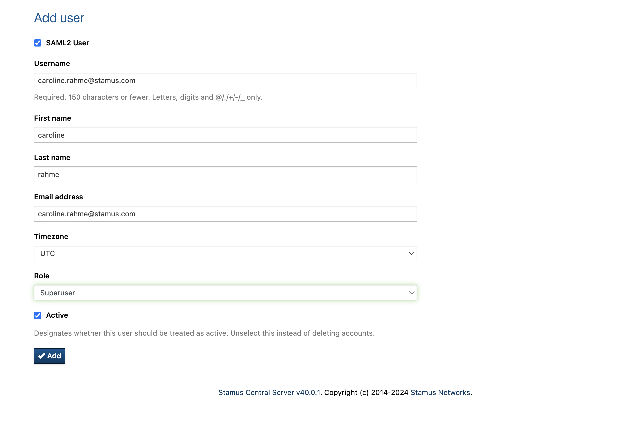
User ID registration
Put the same username and same email address as it is careful set on ENTRA: be careful about the capital letters, they should be EXACTLY the same. Do not duplicate the name of the user with different email addresses: 1 username=1 email address= id on ENTRA
Disconnect and try to log with the SAML Authentification PUT first the email address and then click on the SAML button
For the rest of the configuration follow our Authentication documentation.
MS Teams integration
The goal of this document is to assist in configuring Clear NDR® to send notifications to MS Teams and provide WebHooks examples.
MS Teams Configuration
Channel configuration
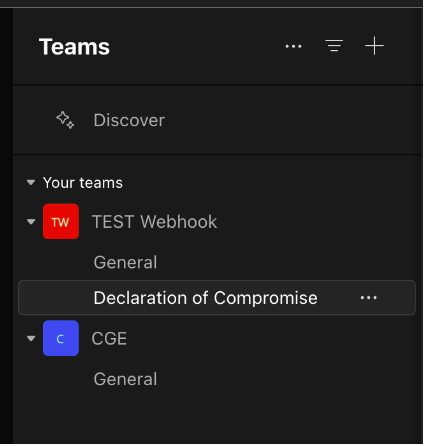
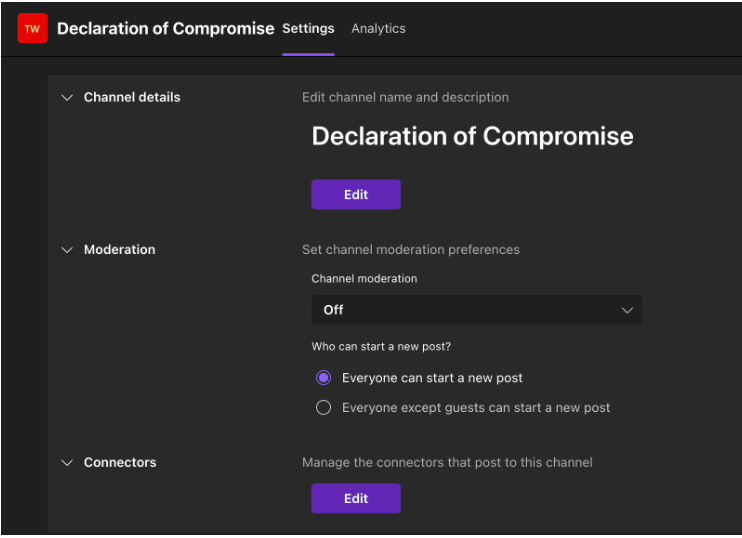
Prior to configuring the incoming webhook, create a dedicated channel in your MS Teams deployment to receive alerts from Clear NDR®:
Incoming webhook configuration
Connect to your MS Teams app to create an Incoming Webhook.
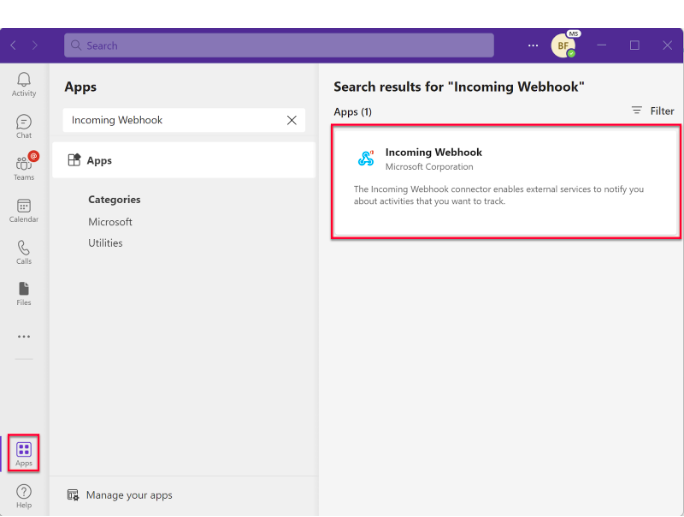
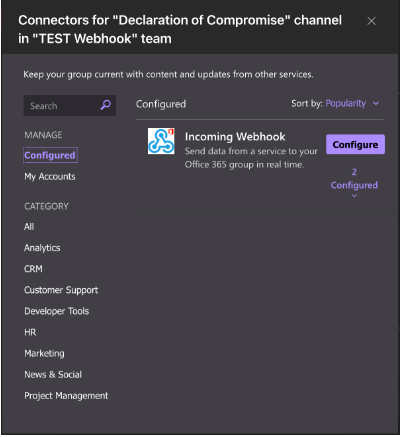
Go to Apps and search for Incoming Webhook:
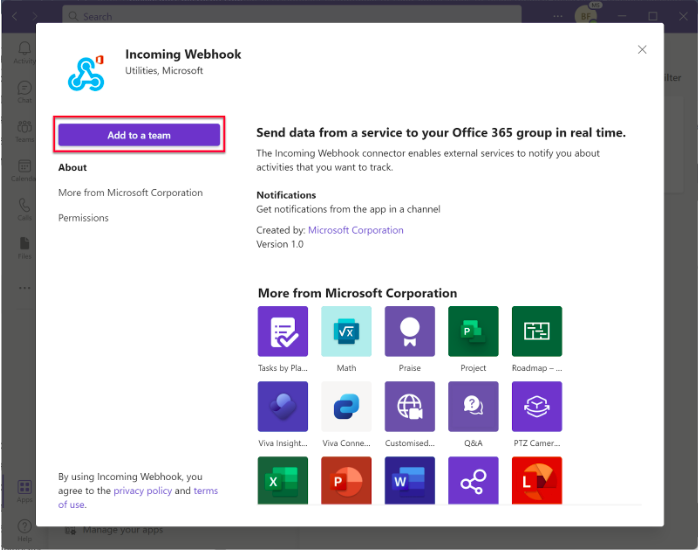
Select the Add to a team button to add the connector to the Team or Team channel name site where you want to send notifications.
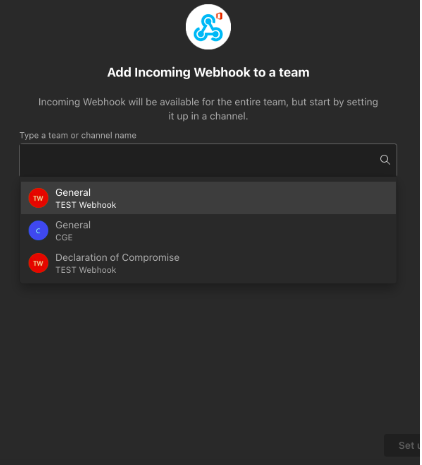
Select the channel in which you an to send the notifications:
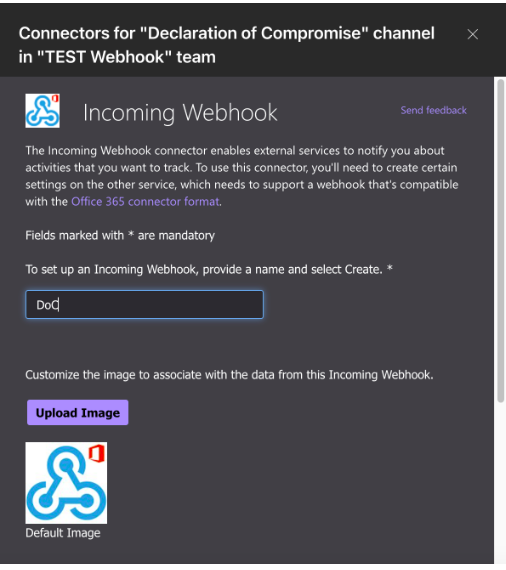
Choose a name for the Incoming webhook and click on Create
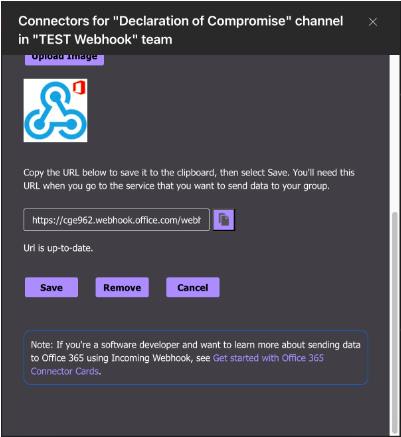
Copy the URL at the bottom of the page and paste it somewhere else. This URL will be re used when configuring the Webhook integration in Clear NDR®:

Delete Webhook configuration in MS Teams
If you need to delete the
Incoming webhook integration, navigate to the list of connectors in the MS Teams channel:
Click on Edit and then click on Configured on the left hand side:
Click on Manage and scroll to the bottom and click on Remove:
Clear NDR® Configuration
Log in to Clear NDR® and navigate the Administration site by clicking on any words below Administration on the left hand side:

In the Administration site, click on Integrations in the drop down menu in the top left:
Create a WebHook that will send an API command to the MS Teams channel:
Variable |
Purpose |
|---|---|
Name |
Name of the webhook you want to create |
Hook |
The alert you want to send to Sentinel One |
URL |
MS Teams channel URL (the one you copy and pasted earlier) |
Headers |
WebHook header |
HTTP Method |
The HTTP method expected by the API endpoint |
Template format |
The format of the request |
Template content |
The actual content of the request |
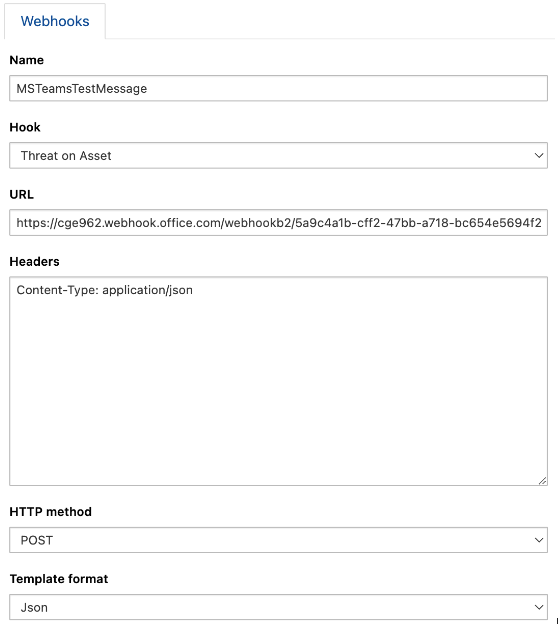
MS Team Webhook example
Send a message to a MS Teams channel
Name: MSTeamsTestMessage
Hook: Threat on Asset
URL: (example) https://cge962.webhook.office.com/webhookb2/5a9c4a1b-cff2-47bb-a718-bc654e5694f2@5984373b-b803-4e43-b16d-e5afa9a67738/IncomingWebhook/d2c6bf1822ec44eb8ad9f1dc528e3989/368102fa-7032-4ec8-b471-aff1aa79c63c
Headers: Content-Type: application/json
HTTP method: POST
Template format: Json
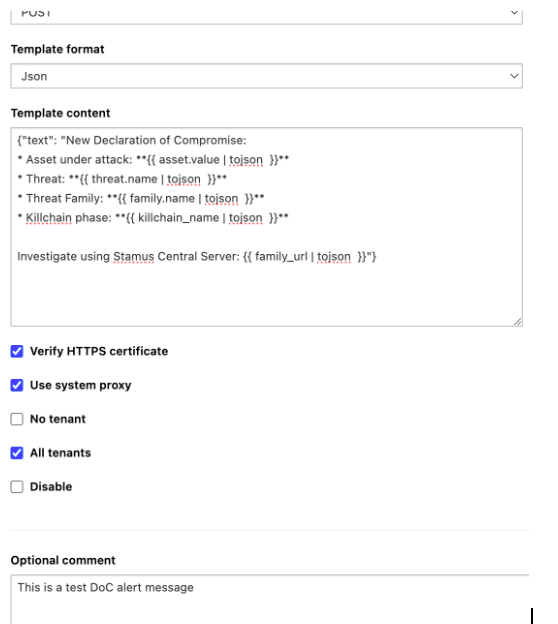
Template content:
{"text": "New Declaration of Compromise:
* Asset under attack: **{{ asset.value | tojson  }}**
* Threat: **{{ threat.name | tojson  }}**
* Threat Family: **{{ family.name | tojson  }}**
* Killchain phase: **{{ killchain_name | tojson  }}**

Investigate using Clear NDR Central Server: {{ family\_url | tojson  }}"}
Verify HTTPS certificate: On
Use system proxy: On
Choose Tenant: Tick the relevant tenant
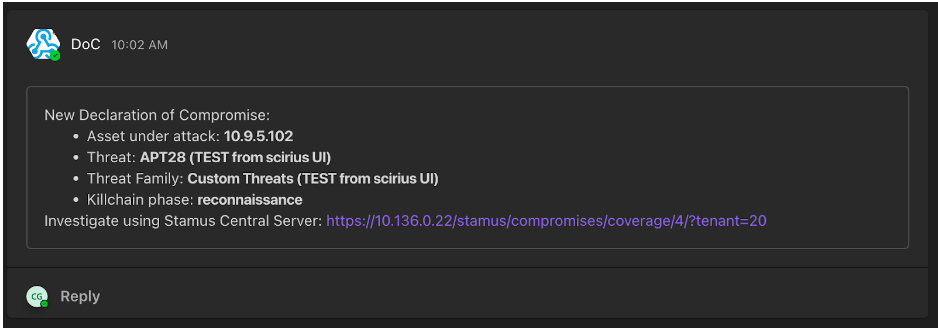
How this would look in Clear NDR®:
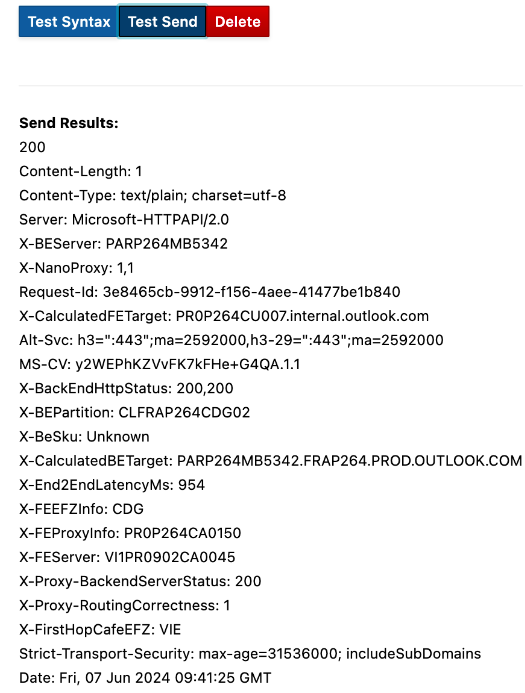
Send a test message by clicking on Test send in the Stamus interface. You should have a 200 OK reply as shown in the screen shot below from MS Teams.
This is what this test alert will look like in the MS Teams channel: