
Warning: You are viewing an older version of this documentation. Most recent is here: 42.2.0
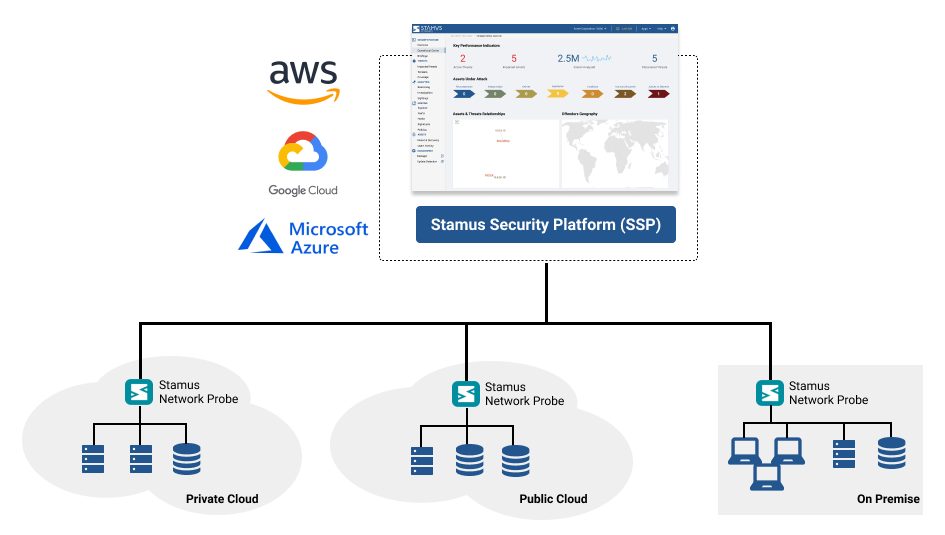
Cloud Installations
Stamus Central Server and/or Stamus Network Probes can be both deployed in a Cloud environment.
Important
The default user’s (scirius) credentials need to be reset with the stamus_config CLI tool on the Stamus Central Server. Select the Reset SCS password option in the menu.
Important
Use user admin for AWS, GCP and adminaz for Azure when connecting over the shell.
Note
Please contact Stamus Networks to obtain the latest images for AWS/GCP/Azure.
AWS - Amazaon Web Services
This guide will show you how to run a Stamus Central Server and Stamus Networks Probe images on AWS cloud using the AWS Management Console (UI), assuming you already have the AMI ID (Amazon Machine Image ID) for the image.
Log in to AWS Management Console
Open your web browser and go to the AWS Management Console.
Log in using your AWS account credentials.
Navigate to the EC2 Dashboard
In the AWS Console, type EC2 in the search bar at the top.
Select EC2 from the search results to access the EC2 dashboard.
Launch a New Instance
From the left-hand menu, click on Instances.
Click the Launch Instances button, usually located near the top right.
Choose AMI (Amazon Machine Image)
You will be prompted to select an AMI.
From the left-hand menu, choose My AMIs.
Enter the AMI ID for the Stamus Networks image in the search bar.
Once your image appears, select it.
Choose an Instance Type
Select the appropriate Instance Type based on the resource requirements of your setup. Refer to the below table for more information.
Solution |
Requirement |
Instance type |
vCPU |
Memory |
Disk size - root |
Disk size - logs |
|---|---|---|---|---|---|---|
Stamus Networks Probe |
Recommended (up to 10Gbps) |
c5.12xlarge / c5.18xlarge |
48 - 72 |
96 GB - 144 GB |
gp3, 100 GB |
gp3, 2000 GB |
Stamus Networks Probe |
Recommended (up to 1Gbps) |
t3.2xlarge / c5.4xlarge |
8 - 16 |
16 GB - 32 GB |
gp3, 70 GB |
gp3, 500 GB |
Stamus Networks Probe |
Minimum (up to 100Mbps) |
t3.medium |
2 |
4 GB |
gp3, 50 GB |
st1, 200 GB |
Stamus Central Server |
Recommended |
c5.12xlarge / c5.18xlarge |
24 - 48 |
48GB - 96 GB |
gp3, 100 GB |
gp3, 1000 GB |
Stamus Central Server |
Minimum |
t3.2xlarge / c5.4xlarge |
4 - 8 |
16 GB |
gp3, 70 GB |
gp3, 500 GB |
Configure Instance Details
In this step, you can configure various options such as the number of instances, network, and availability zone.
For most cases, the default options are sufficient: - Number of Instances: Ensure this is set to 1. - Network: Default VPC is often suitable unless you have specific requirements. - Auto-assign Public IP: Ensure it’s set to Enable if you want internet access to the instance.
Click Next: Add Storage to proceed.
Add Storage (Optional)
The AWS Stamus Networks images support 1 or 2 disk storage systems. Refer to the table above for how to partition your instance properly.
Configure Security Group
The Security Group controls network traffic to and from your instance.
If you don’t have an existing security group: - Select Create a new security group. - Add rules for necessary traffic. For example: - For SSH access: Add a rule for SSH on port 22. - For web access to the Stamus Central Server: Add rules for HTTPS (port 443). - Set the Source to 0.0.0.0/0 for open access (not recommended for SSH). Alternatively, use your IP address for restricted access. See more information here for what ports need to be open for logshipping and management between the SCS and Probes
Click Review and Launch.
Review and Launch
Double-check all your configurations to ensure they are correct.
Click Launch.
Select a Key Pair for SSH Access
AWS will prompt you to select a key pair for secure access via SSH.
If you already have a key pair, select it from the list. Otherwise:
Choose Create a new key pair.
Download the key pair and store it safely (you’ll need this to access the instance via SSH).
Tick the box acknowledging that you have access to the key pair, then click Launch Instances.
Access the Instance
Your instance will take a few minutes to launch. Once done, navigate back to Instances in the EC2 dashboard.
Select your instance to view details such as the Public IP address (if assigned) and the Instance State.
Connect to the Instance
To connect to your instance via SSH, select the instance and click Connect in the top menu.
Follow the instructions provided by AWS to connect using your key pair and the public IP address.
GCP - Google cloud platform
This guide will explain how to run a Stamus Networks image on the Google Cloud Platform (GCP) using the Cloud Console (UI), assuming you already have the Image ID.
Log in to Google Cloud Console
Open your web browser and navigate to the Google Cloud Console <https://console.cloud.google.com/>.
Log in using your Google account credentials.
Navigate to the Compute Engine Dashboard
In the Google Cloud Console, click the Navigation Menu in the top-left corner.
Scroll down and select Compute Engine.
In the Compute Engine dashboard, click VM instances to proceed to the instances page.
Create a New Instance
On the VM instances page, click the Create Instance button, located at the top.
This will bring you to the configuration page where you can define details for the new instance.
Configure the Instance Name and Region
In the Name field, give your instance a unique name (e.g., SCS-gcp-40.0.0).
Select the Region and Zone where you want to deploy the instance. Choose the region closest to your user base for optimal performance.
Select Stamus Networks Image
In the Machine Configuration section, under Boot disk, click Change.
In the boot disk configuration window:
Select Custom Images from the left-hand menu.
Search for and select the Stamus Networks SCS or Probe Image.
Once your custom image is selected, click Select to save the changes.
Choose a Machine Type
Choose the Machine type that suits your workload.
You can customize CPU and memory if needed.
Solution |
Requirement |
Instance type |
vCPU |
Memory |
Disk size - boot |
Disk size - logs |
|---|---|---|---|---|---|---|
Stamus Networks Probe |
Recommended (up to 10Gbps) |
e2,n2 |
8 - 72 |
96 GB - 144 GB |
SSD persistent, 100 GB |
SSD persistent, 2000 GB |
Stamus Networks Probe |
Recommended (up to 1Gbps) |
e2,n2 |
8 - 16 |
16 GB - 32 GB |
Standart persistant, 70 GB |
Standart persistant, 500 GB |
Stamus Networks Probe |
Minimum (up to 100Mbps) |
e2,n2 |
2 |
4 GB |
Standart persistant, 50 GB |
Standart persistant, 200 GB |
Stamus Central Server |
Recommended |
e2,n2 |
24 - 48 |
48GB - 96 GB |
SSD persistent, 100 GB |
SSD persistent, 1000 GB |
Stamus Central Server |
Minimum |
e2,n2 |
4 - 8 |
16 GB |
Standart persistant, 70 GB |
Standart persistant, 500 GB |
Configure Additional Storage (Optional)
The GCP Stamus Networks images support 1 or 2 disk storage systems. Refer to the table above for how to partition your instance properly.
Configure Firewall and Network
Scroll down to the Firewall section and configure the following:
If you want to allow SSH traffic, select Allow SSH traffic.
If you want to allow HTTPS traffic, select Allow HTTPS traffic.
In the Networking section, configure any specific network settings or leave them at the default (recommended for most cases).
Review and Create the Instance
Double-check all the configuration settings to ensure they are correct.
Once satisfied with the setup, click the Create button at the bottom of the page.
The instance will be created and should appear in the VM instances list once it’s ready.
Access the Instance (Optional)
To access your new instance, click the SSH button next to your instance in the VM instances list.
GCP will automatically open a browser-based terminal for you to manage the instance.
Microsoft Azure Cloud
Note
As of October 2021, Microsoft Azure Virtual Network TAP is on hold for all regions. Deploying Network Probes in Microsoft Azure requires a third party packet broker.
Log in to Azure Portal
Open your web browser and navigate to the Azure Portal.
Log in using your Microsoft account credentials.
Navigate to the Virtual Machines Dashboard
In the left-hand menu, click on Virtual Machines.
In the Virtual Machines dashboard, click Create and then select Azure virtual machine from the dropdown.
Choose a Resource Group
In the Basics tab, select an existing Resource Group or create a new one by clicking Create new.
A Resource Group helps manage related Azure resources as a unit.
Configure Virtual Machine Name and Region
Enter a Name for your virtual machine (e.g., SCS-Azure-40.0.0).
Choose a Region from the dropdown where you want the VM to be hosted. It’s best to choose the region closest to your users or infrastructure for better performance.
Choose a Stamus Networks Image
In the Image dropdown, click on See all images.
In the Select an image window, go to the My Images tab.
Search for and select the desired Stamus Networks Image.
Once your image is selected, click Select to confirm.
Select the VM Size (Instance Type)
In the Size section, click on See all sizes to view available virtual machine sizes.
Once selected, click Select to confirm the size.
Solution |
Requirement |
Instance type |
vCPU |
Memory |
Disk size - boot |
Disk size - logs |
|---|---|---|---|---|---|---|
Stamus Central Server |
Recommended |
Standard_D32_v3 |
32 |
64-128 GB |
Premium SSD, 100 GB |
Premium SSD, 1000 GB |
Stamus Central Server |
Minimum |
Standard_D8_v3 |
4-8 |
16-32 GB |
Standart SSD, 70 GB |
Standart SSD, 500 GB |
Configure Administrator Account
In the Administrator account section, choose the authentication method:
SSH Public Key: If you use SSH, select this option and provide your public key.
Password: Alternatively, you can choose Password and create a username and password for login.
Ensure you choose SSH Public Key for better security when accessing the instance via SSH.
Configure Networking
Under the Networking tab, configure your virtual network (VNet) and subnet, or use the defaults if you don’t have specific requirements.
In the Public IP section, ensure a public IP is selected if you want the VM to be accessible from the internet.
In the Inbound port rules section, ensure that:
SSH (22) is allowed if you need to access the instance via SSH.
Allow also HTTPS traffic.
Configure Disk and Storage (Optional)
The Azure Stamus Networks images support 1 or 2 disk storage systems. Refer to the table above for how to partition your instance properly.
Choose from Standard HDD, Standard SSD, or Premium SSD based on your performance requirements (see table above).
Review and Create the Virtual Machine
Once all the configurations are completed, click Review + create at the bottom of the page.
Azure will validate your configuration. If everything is correct, click Create to deploy your virtual machine.
Access the Virtual Machine (Optional)
Once the deployment is complete, navigate back to Virtual Machines in the Azure Portal.
Select the newly created virtual machine to view details.
If you allowed SSH access, you can connect by clicking the Connect button and following the provided SSH instructions.
Considerations
Security: Ensure your security groups are properly configured to prevent unauthorized access. For SSH, avoid using 0.0.0.0/0, which opens access to everyone. Instead, restrict access to specific IP addresses.
Cost Management: Be mindful of the instance type you select, as this impacts costs. Remember to stop or terminate instances when not in use to avoid unnecessary charges.